Saturday, September 22, 2012

Wednesday, September 19, 2012
Bookcase
Feeling a little under the weather, this week. Decided to stay home today to see if I can get a handle on this bug that is desperately trying to drag me into the gutter (get off me, you stoopid microbe). Am currently sitting in bed with canine companions (they have commandeered all the space, by the way...I'm just squeezed in here, all pretense that I hold any authority over them has evaporated)(Maggie is trying to simultaneously flatten my kneecap and push my laptop to the floor with her head). I figured I would take the opportunity presented to me by my viral hitch-hiker and clean out my computer's folders between naps. Boring, I know, but my standards for distraction are low at the moment.
And hey, guess what? While tidying my laptop up, I came across a goodie that I meant to post here and had forgotten all about! Yay!
So without further ado, I present to you the following tutorial from the archive (this was originally published in Volume Two of Creative Humans):


 Label them, using the
pencil and masking tape. The little
piece of waste wood may be discarded.
Label them, using the
pencil and masking tape. The little
piece of waste wood may be discarded.


 *Note: Because this
here pattern is intended to use only one full sheet of plywood, you will notice
that we are missing a shelf. That is ok,
we will leave one compartment smaller than the others and it will remain shelf-less.
*Note: Because this
here pattern is intended to use only one full sheet of plywood, you will notice
that we are missing a shelf. That is ok,
we will leave one compartment smaller than the others and it will remain shelf-less.


And hey, guess what? While tidying my laptop up, I came across a goodie that I meant to post here and had forgotten all about! Yay!
So without further ado, I present to you the following tutorial from the archive (this was originally published in Volume Two of Creative Humans):
The One-Sheet-of-Plywood Bookcase
Just after graduating
from college, I got a job working for an architect from Europe who had just
finished building his own home (our office was actually in the attic). One of the things I learned from him was the knack of taking simple, easy-to-source materials and turning them into functional
and attractive objects. Their house was filled with ingenious little touches of
innovation, most of which was DIY and all of which was affordable.
This
“one-sheet-of-plywood” bookcase was his idea:
Materials:
*A note on plywood:
The quality of plywood can vary greatly, from
supplier-to-supplier. It can be very
disappointing to spend hours on a project like this and then discover that
there are gaps in the layers or imperfections in the veneer. Do yourself a favor and take the time to
source a nice, evenly-finished piece, with thick layers (a sheet should have no
more than 7 smooth plies and the thicker the veneer, the better).
-
1 sheet (4’ x
8’) of birch or maple-veneered 3/4” plywood
-
1-1/2” long
size 8 wood screws (min. 30 of them)
-
“finishing
washers” for size 8 screws (min. 15 of them) – these are also sometimes called
“cup washers”
-
1/2” long size
8 wood screws (min. 55 of them)
-
3/4” x 3/4” x
3/4” 90°
metal braces (if you look in the assembly photos, you’ll see what these look
like – they’re going to hold the shelves in place)
-
cabinet/furniture
legs (check out the Besta legs, at Ikea – I don’t have access to Ikea, so I
can’t confirm how they’re made…you’ll have to investigate your options
carefully in order to be sure that they’ll work)
-
1 quart of
clear, acrylic polyurethane, in satin finish
-
1 foam brush
or other suitable applicator for the polyurethane
-
an electric
drill
-
a size 8
screwdriver bit for the drill
-
a drill bit
suitable for drilling pilot holes for the size 8 screws (a 3/32” drill bit
should be fine)
-
sandpaper (220
grit)
-
a table saw,
if your hardware store can not cut the plywood for you
-
a pencil
-
a ruler
-
a measuring
tape
-
some masking
tape or labels to identify your pieces
Preparation
Instructions

Most hardware stores
offer a cutting service (they may charge a small fee per cut, which is totally
worth it) when you purchase lumber from them.
Have them carry the sheet of plywood over to the saw for you (remember: you
break it, you buy it) and give them the following cutting diagrams:
Step one:
Cut the long pieces
and label the first two, using the pencil and masking tape. One will be the top and one will be the
bottom. The skinny little strip (colored
in gray in the diagram) is waste - you
can discard it.

Step two:
Take the remaining
two lengths of wood and cut them like so:
 Label them, using the
pencil and masking tape. The little
piece of waste wood may be discarded.
Label them, using the
pencil and masking tape. The little
piece of waste wood may be discarded.
*Note: Don’t cut your pieces in 24” increments, even
though logic would tell you that it’s a good idea. The saw blade “eats up” some wood, so if you
stick with the dimensions shown, everything will be modular and therefore, will
fit together.

Once everything is
cut, you will have a nice collection of pieces, ready to pack into your car and
take home. You do not need to be driving
a truck or an SUV in order to get them home – I’ve done this several times in
my hatchback. Just fold the passenger
and back seats down and slide the pieces in.
Have a backup plan in case it doesn’t work, but don’t sweat it – there
are many ways to get these puppies home.
The next step
involves finishing your pieces individually, prior to assembling
everything. Follow the instructions on
your polyurethane, which usually call for applying 2 to 3 coats, sanding before
and between coats, and permitting the pieces to dry adequately.
Assembly Instructions

The first step in the
assembly process is to make a box, using the top, bottom and 2 gable
pieces. The top piece will rest ON TOP
OF the gables and the bottom piece will be attached UNDER the gables. All the gables are the same height, so if you
attach the gables to the ends of the top and bottom, you will have a problem –
the intermediate gables won’t fit!

You need to carefully
identify (in the top and bottom pieces), where the screws will go and drill
pilot holes. Use the ruler and pencil
for marking the holes and don’t press hard.
Each gable gets 6
screws – 3 through the top piece (with finishing washers) and 3 through the
bottom. Use the 1-1/2” long screws for
this. Obviously, the bottom screws will
be concealed, so there’s no need to use finishing washers with them.
Mark the placement
for and install the three intermediate gables.
Here is your gable layout:
 *Note: Because this
here pattern is intended to use only one full sheet of plywood, you will notice
that we are missing a shelf. That is ok,
we will leave one compartment smaller than the others and it will remain shelf-less.
*Note: Because this
here pattern is intended to use only one full sheet of plywood, you will notice
that we are missing a shelf. That is ok,
we will leave one compartment smaller than the others and it will remain shelf-less.
This is what the top
of the unit will look like (the bottom will look virtually the same – just
without the finishing washers):

The next step is to
attach the shelves:

Using the 3/4” x 3/4”
x 3/4” braces, screw the shelves into the bookcase (use the 1/2” long screws,
here). Make sure you also screw up into
the bottom of each brace, or your shelves will be wobbly and likely shift
around:

Once the shelves are
in, your only remaining task is to find legs for the unit (or some other
imaginative way to elevate the bookcase off the floor, like a plinth made of
scrap lumber, bricks, etc). Follow the
leg manufacturer’s instructions, keeping in mind that you only have 3/4” of
plywood to “bite” into and install at least 6 of them in order to get a good,
stable base.

Once you’ve made one
of these, you’ll find that it becomes addictive. Why not make the next one with sliding
doors? Or mount it to the wall, so it
floats above the floor? This first
bookcase is really just a gateway bookcase…next thing you know, you’ll be
whipping together coffee tables on casters, desks, TV stands, you name it! *
*Trust me on this; my house is filled to the gills with birch
plywood furniture.
Monday, September 17, 2012
Eye Candy
I've always tried really hard to come up with "meaty" posts here because I figure if you're going to spend your precious time coming to read what I have to say, I may as well put some effort into it.
The only problem with that is that it's really time-consuming and after an excruciatingly long week at work, my brain (and body) shuts down. So I'm going to start publishing things here that I've simply found online during the week; things that have inspired me or made me sit up and take notice.
I hope you enjoy these little "micro-posts" and if you have any ideas or items you want to share that fit the theme, please leave a link in the comments.
Here's the first one:
BE LINEN MOVIE IN ENGLISH from Linen and hemp community on Vimeo.
The only problem with that is that it's really time-consuming and after an excruciatingly long week at work, my brain (and body) shuts down. So I'm going to start publishing things here that I've simply found online during the week; things that have inspired me or made me sit up and take notice.
I hope you enjoy these little "micro-posts" and if you have any ideas or items you want to share that fit the theme, please leave a link in the comments.
Here's the first one:
BE LINEN MOVIE IN ENGLISH from Linen and hemp community on Vimeo.
Wednesday, September 12, 2012
Wednesday, August 29, 2012
Clapotis
You guys know Clapotis, right? It was published on Knitty.com in 2004 (I actually remember the first time I saw it - Knitty used to rock my world) and it kind of took the knitting world by storm.
As of this very moment, Clapotis is the most-knitted pattern on Ravelry (ever), with a project count of 19,635.
In case you weren't sure, let me assure you that that is Crazy Town.
Thing is, I've never felt compelled to knit it. Wasn't even sure I liked it (which I realize makes me sound more than somewhat delusional, but whatever).
Then I bought this silk yarn from the Mill (aka: my LYS) and I really wasn't sure what to do with it. I bought it as a gift for someone and then when my trip got cancelled and I was really upset, I decided to make myself something with it, instead ('cause I'm supposed to avoid chocolate and the situation was dire). I just didn't know what, yet. I only had the one skein...
So while I was in Ottawa, I visited a neat little shop on Wellington called Wabi Sabi and the lady there was a dear. She helped me find a coordinating skein of a lovely merino hand-dyed on Salt Spring Island (and I was supposed to visit Salt Spring Island on my trip...oh, the irony) called Kattikloo.
{Canada has a lot of (what the uneducated would call "funny-sounding") Native place names...like Gichigami and Nackawic and Kouchibouguac and Winnipegosis and Kejimkujik and Mactaquac. These Cree/Ojibwe/Mi'kmaq/etc. names are imbued with ancient history and, at the risk of sounding like a crack-pot, a deep spiritual affinity that I think many Canadians - regardless of their ethnicity - feel towards their country's geography. These names pay homage to our Native roots and make our country what it is. All this to say that I'm not sure what "Kattikloo" means, but it sounds Native and if that is the case, I'm sure it was chosen for a very good reason. I think I'll e-mail the dyer to ask...}
ANYWAY, as I was saying, I bought a coordinating skein of merino and I pored over the pattern possibilities in Ravelry and came up with this:


 Um, yeah. I love it. Can't wait until Fall (*gasp*!) so I can wear it every day.
As of this very moment, Clapotis is the most-knitted pattern on Ravelry (ever), with a project count of 19,635.
In case you weren't sure, let me assure you that that is Crazy Town.
Thing is, I've never felt compelled to knit it. Wasn't even sure I liked it (which I realize makes me sound more than somewhat delusional, but whatever).
Then I bought this silk yarn from the Mill (aka: my LYS) and I really wasn't sure what to do with it. I bought it as a gift for someone and then when my trip got cancelled and I was really upset, I decided to make myself something with it, instead ('cause I'm supposed to avoid chocolate and the situation was dire). I just didn't know what, yet. I only had the one skein...
So while I was in Ottawa, I visited a neat little shop on Wellington called Wabi Sabi and the lady there was a dear. She helped me find a coordinating skein of a lovely merino hand-dyed on Salt Spring Island (and I was supposed to visit Salt Spring Island on my trip...oh, the irony) called Kattikloo.
{Canada has a lot of (what the uneducated would call "funny-sounding") Native place names...like Gichigami and Nackawic and Kouchibouguac and Winnipegosis and Kejimkujik and Mactaquac. These Cree/Ojibwe/Mi'kmaq/etc. names are imbued with ancient history and, at the risk of sounding like a crack-pot, a deep spiritual affinity that I think many Canadians - regardless of their ethnicity - feel towards their country's geography. These names pay homage to our Native roots and make our country what it is. All this to say that I'm not sure what "Kattikloo" means, but it sounds Native and if that is the case, I'm sure it was chosen for a very good reason. I think I'll e-mail the dyer to ask...}
ANYWAY, as I was saying, I bought a coordinating skein of merino and I pored over the pattern possibilities in Ravelry and came up with this:


Friday, August 24, 2012
Caller Herrin


Things I have learned (the hard way, naturally) about Fair Isle knitting:
- It must be good and blocked. After a good soaking. No cheating allowed.
- Fair Isle swatches lie. The little guy at the top of this post is a liar liar pants on fire. It still worked out, but I've got my eye on him...
- The end-of-round jog isn't as noticeable as I thought it would be.
- Surprisingly, I really enjoy it.
Sunday, August 19, 2012
Alive and Kicking
Wow, so my last post was on May 17th, eh?
Yikes.
Well, I'm not going to apologize or feel bad about that, 'cause you know what? I started this blog for fun and I'll be damned if I'm going to start treating like a chore.
Having said that, I can still fill you in on what has been going on, right?
Work. Work has been going on.
In October/November of last year, the company I work for (I run a small department that deals with drafting/facilities management of a 65-store retail company) decided to purchase and renovate a 100+ year-old building (former potato warehouse built in a post and beam style) as a new head office. It is located in the oldest part of the city (on the harbour waterfront) and it is a heritage building. Yours truly was in charge of the design and drafting, I managed the consultants, I wrote the specifications, I administered the contract, I managed the contractor, I tendered out the furniture contract and I also organized/managed the physical move itself (for 30+ employees).
Phew. No wonder I wasn't blogging.
Some photos during the last weeks of construction (I don't have any before shots on this computer, but trust me when I say that it was AWFUL - picture cheap wood panelling and glass block and country blue walls with floral wallpaper borders...*shudder*):
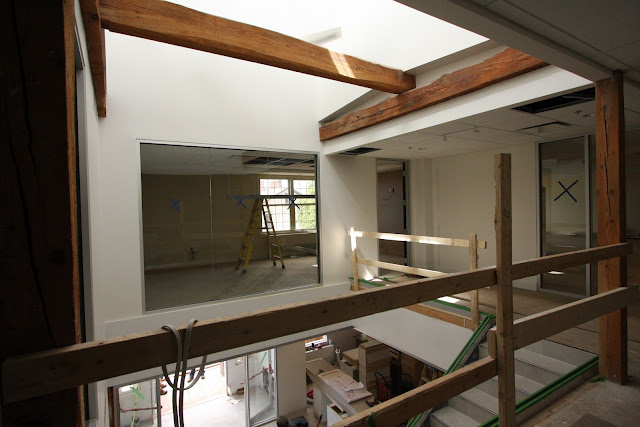


 So yeah, my spring and summer have been consumed with this massive (my first real honest-to-goodness, start-to-finish) interior design project and subsequent move. And this is my office, now (fourth image from the top - the one with the birch doors). It's pretty cool, but I gotta say: I'm so freaking relieved that it's over.
I'm finally starting to reclaim (my mind and) my life. It's kind of scary to me how easy it is to get wrapped up in these projects - I hate that aspect of my work. It feels like I gave birth to this stupid building and I really wish there was a way for me to do what I do without feeling so personal about it... Oh well, that's a discussion for another time, perhaps.
So, what else happened? Well, my awesome fantastic OMG cross-Canada road trip didn't. It got cancelled. Two days before I was scheduled to fly to Ottawa and meet my mom, she had to pull the plug. It's a long, dramatic, epic tale of woe and I was totally heartbroken so I'm not going to get into it again. I flew to Ottawa anyway, to visit with my mom (for Canada Day long weekend...*shudder*), and came back a few days later. She eventually made her way to Winnipeg and just left there last week for Kamloops. I think she's settled in there, now (note to self: call mother to verify survival of journey).
On the home front, I've been visiting the farmer's market religiously this summer (we have been experiencing a drought, but the farmers are hanging in there) and have made a few new acquaintances that are pretty inspiring. We are ruminating some ideas for a new project together, which we may execute this fall/winter, so that's exciting.
The Mill has been holding some classes, which I've managed to miss (I was unaware of the first, away on my mini-trip for the second and apparently totally confused for the third), but hope to make the last one - the one on lace knitting. I already know how to knit lace, but hey, what kind of self-respecting knitter passes up the chance to learn more about knitting? What kind, I ask you?
And of course, there has been lots of knitting. I think I can safely say that I have officially evolved into one of THOSE knitters - you know, the ones who knit everyday and see no issue with knitting at parties and barbecues? Yup, that's me now.
(Photo documentation of said knitting to follow.)
Yikes.
Well, I'm not going to apologize or feel bad about that, 'cause you know what? I started this blog for fun and I'll be damned if I'm going to start treating like a chore.
Having said that, I can still fill you in on what has been going on, right?
Work. Work has been going on.
In October/November of last year, the company I work for (I run a small department that deals with drafting/facilities management of a 65-store retail company) decided to purchase and renovate a 100+ year-old building (former potato warehouse built in a post and beam style) as a new head office. It is located in the oldest part of the city (on the harbour waterfront) and it is a heritage building. Yours truly was in charge of the design and drafting, I managed the consultants, I wrote the specifications, I administered the contract, I managed the contractor, I tendered out the furniture contract and I also organized/managed the physical move itself (for 30+ employees).
Phew. No wonder I wasn't blogging.
Some photos during the last weeks of construction (I don't have any before shots on this computer, but trust me when I say that it was AWFUL - picture cheap wood panelling and glass block and country blue walls with floral wallpaper borders...*shudder*):


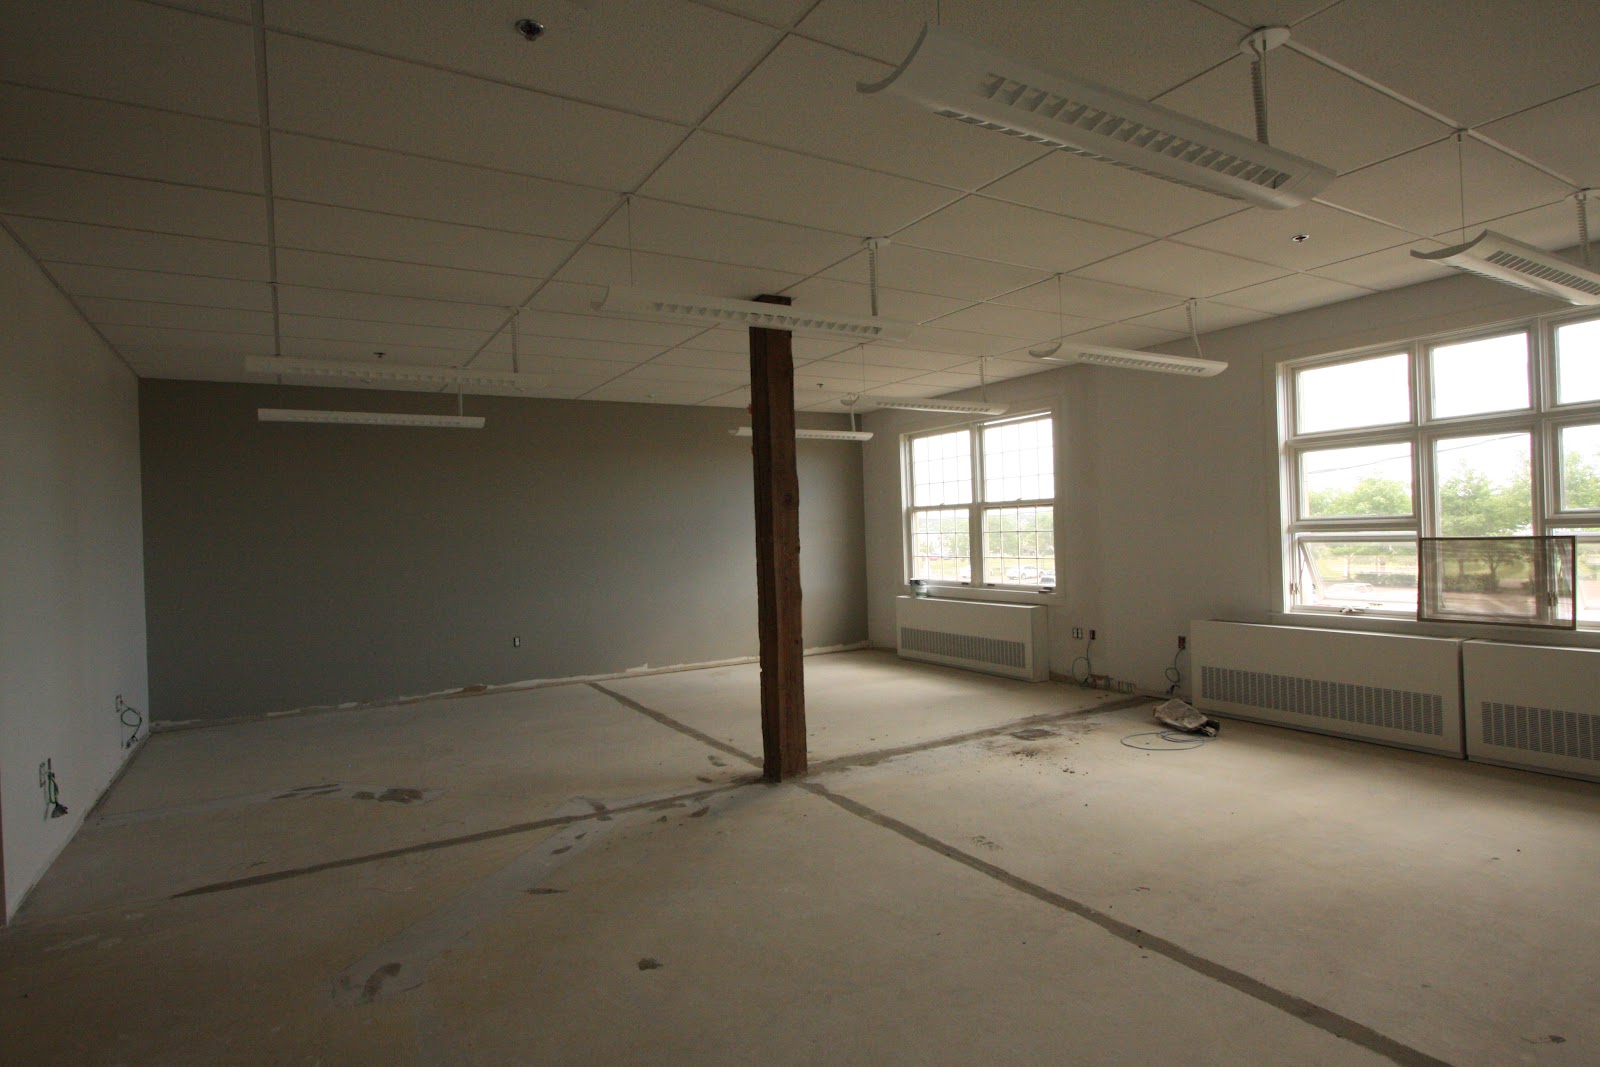


I'm finally starting to reclaim (my mind and) my life. It's kind of scary to me how easy it is to get wrapped up in these projects - I hate that aspect of my work. It feels like I gave birth to this stupid building and I really wish there was a way for me to do what I do without feeling so personal about it... Oh well, that's a discussion for another time, perhaps.
So, what else happened? Well, my awesome fantastic OMG cross-Canada road trip didn't. It got cancelled. Two days before I was scheduled to fly to Ottawa and meet my mom, she had to pull the plug. It's a long, dramatic, epic tale of woe and I was totally heartbroken so I'm not going to get into it again. I flew to Ottawa anyway, to visit with my mom (for Canada Day long weekend...*shudder*), and came back a few days later. She eventually made her way to Winnipeg and just left there last week for Kamloops. I think she's settled in there, now (note to self: call mother to verify survival of journey).
On the home front, I've been visiting the farmer's market religiously this summer (we have been experiencing a drought, but the farmers are hanging in there) and have made a few new acquaintances that are pretty inspiring. We are ruminating some ideas for a new project together, which we may execute this fall/winter, so that's exciting.
The Mill has been holding some classes, which I've managed to miss (I was unaware of the first, away on my mini-trip for the second and apparently totally confused for the third), but hope to make the last one - the one on lace knitting. I already know how to knit lace, but hey, what kind of self-respecting knitter passes up the chance to learn more about knitting? What kind, I ask you?
And of course, there has been lots of knitting. I think I can safely say that I have officially evolved into one of THOSE knitters - you know, the ones who knit everyday and see no issue with knitting at parties and barbecues? Yup, that's me now.
(Photo documentation of said knitting to follow.)
Subscribe to:
Posts (Atom)